Set Up an IDE (Integrated Development Environment) for Go:


December 23, 2021, Learn eTutorial
1562

What is an IDE?

IDEs are the applications used to assist the programmers in the development of other applications. They are designed to enclose almost every programming task in a single application. IDEs increase the productivity of programmers and speed up the development of software products.
There are free IDEs available on the internet, including Visual Studio Code (VS Code), Eclipse, etc. Some of the IDEs that require payments to use them are Goland and IntelliJ IDEA. These IDEs can be used for both editors and debugging of the Go commands.

Web-based (online) IDE’s can also be used for the development of software, but they provide limited functionality. The main advantages of web-based IDEs are that it requires less setup effort, reduce personal hardware requirements, etc.
Some of the free web-based IDE’s URLs are given below:
https://play.golang.org
https://www.onlinegdb.com

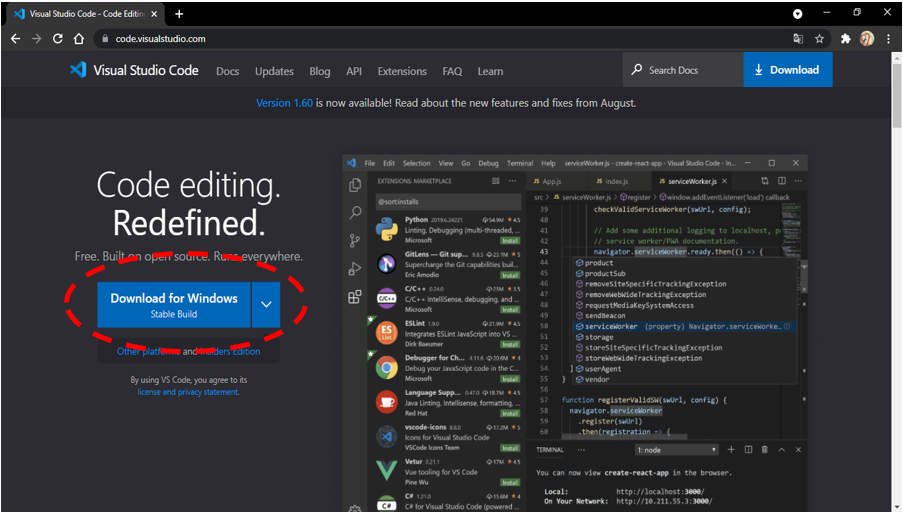
In this tutorial, we will use VS Code as the IDE for Go.

Installation of Visual Studio Code (VS Code):

VS Code is a free IDE used in operating systems such as Windows, macOS, and Linux. VS Code developed by Microsoft. VS Code supports many other programming languages like HTML, JavaScript, Java, CSS, etc.
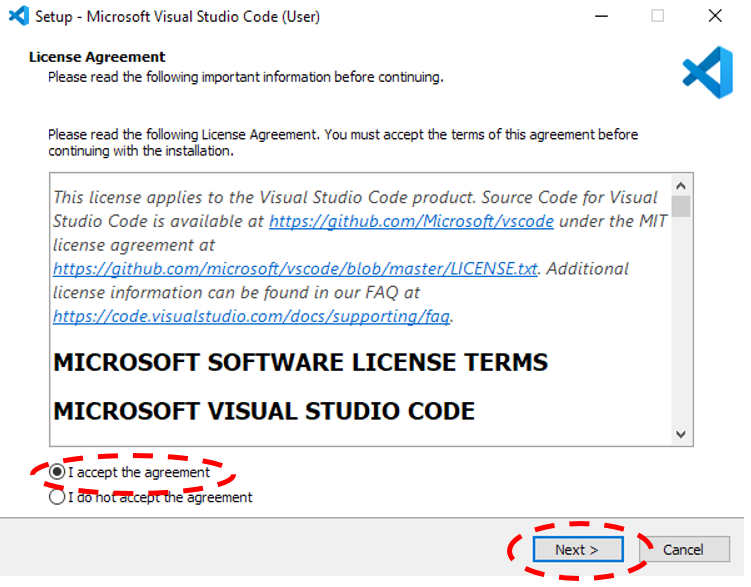
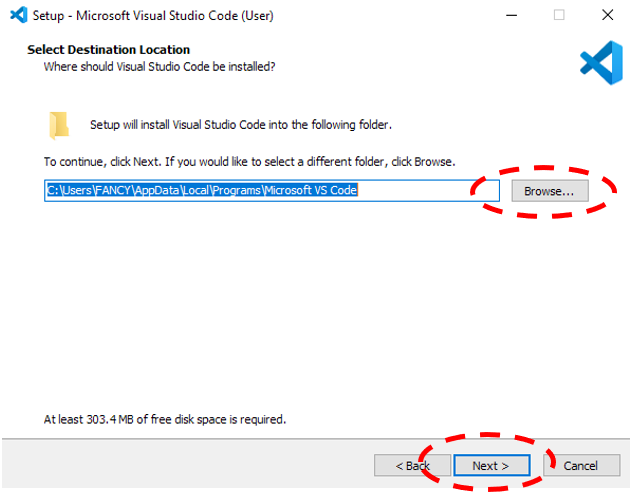
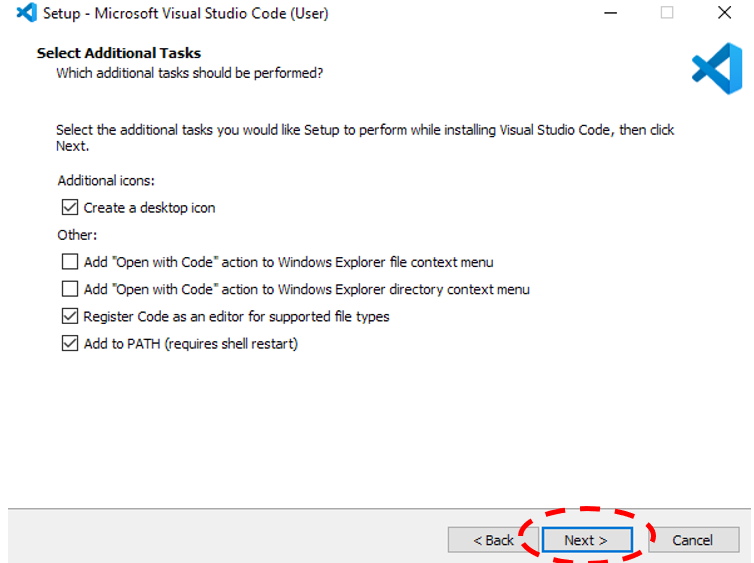
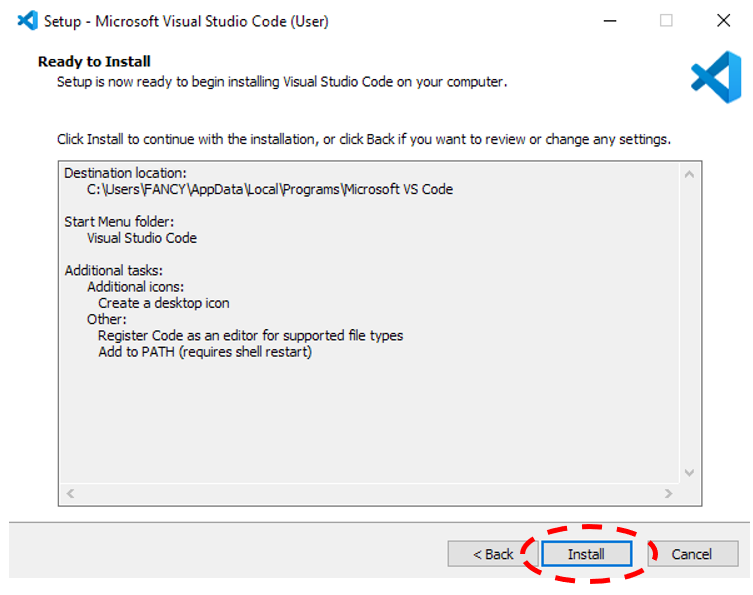
Follow the steps below to install VS Code:

  1.     Visit the link below:
    https://code.visualstudio.com/
  2.     Click on the “download” option to download the VS Code installer for your corresponding operating system.
    GO : IDE
  3.     Run the installer when downloading completes. It will only take less than a minute.
  4.     Then accept the license agreement and click the “Next” button.
    GO : IDE
  5.     Set the destination location to install VS Code.

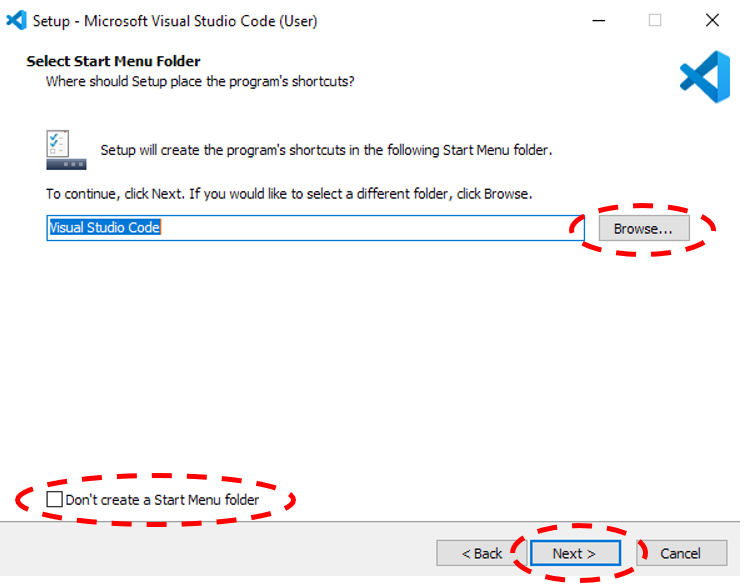
    (A default destination location will be given, but if you want to install VS Code on a different location, then click the “Browse…” button to select another destination location.)

    GO : IDE
  6.     The next window is to set up a Start Menu folder. If you want to select a different folder, click on the “Browse…” button, and if you don’t want to create any Start Menu folder, click on the given check box below. Then click the “Next” button.
    GO : IDE
  7.      The next window will provide additional tasks to perform while installing the VS Code. Select the additional tasks you would like to set up to perform, then click on the “Next” button.
    GO : IDE
  8.     Click on the “Install” button to begin the installation of VS Code and wait until the installation is completed.
    GO : IDE
  9.     Once the installation is completed, click on the “Finish” button, and the VS Code will get open.
    GO : IDE

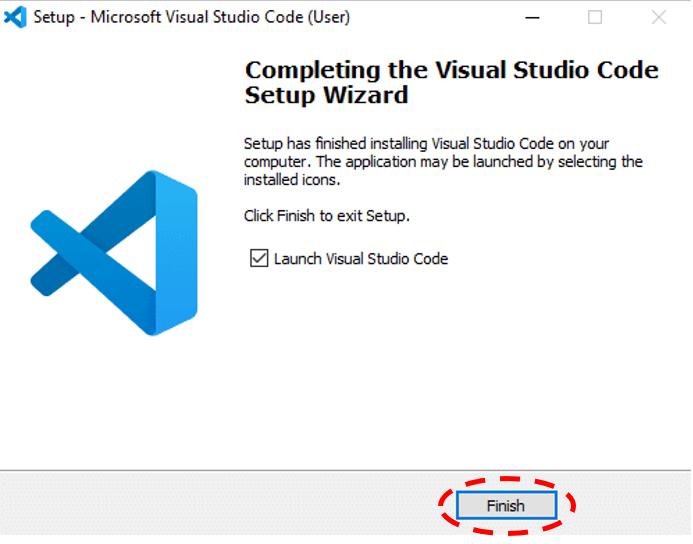
Now the installation of VS Code is successfully completed on your system.

Configure VS Code to Use Go 

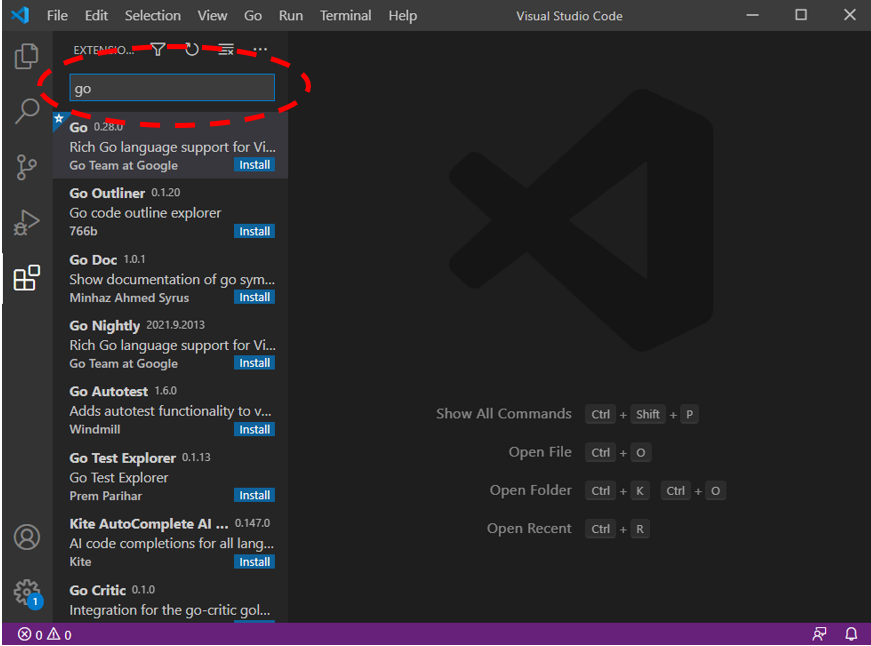
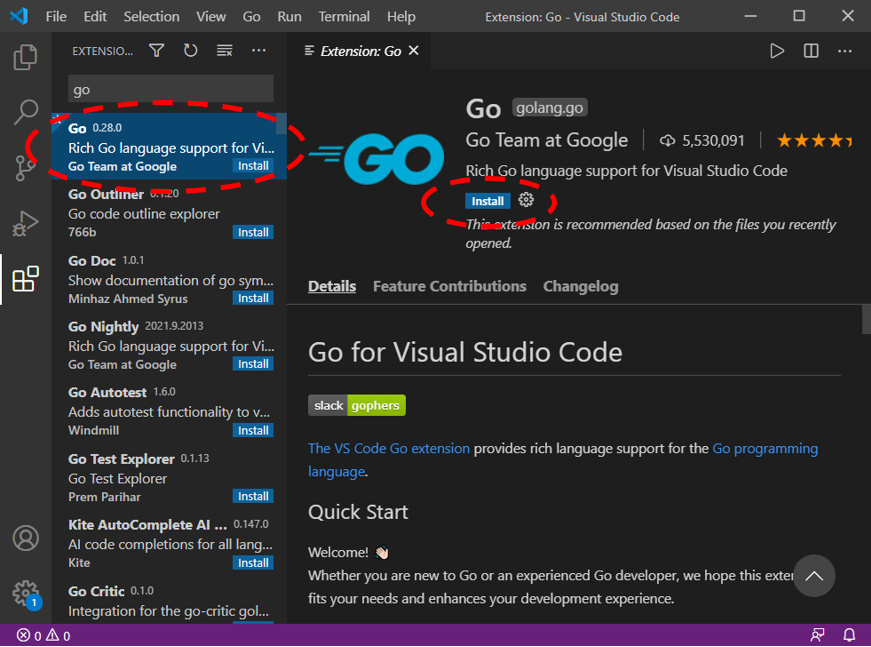
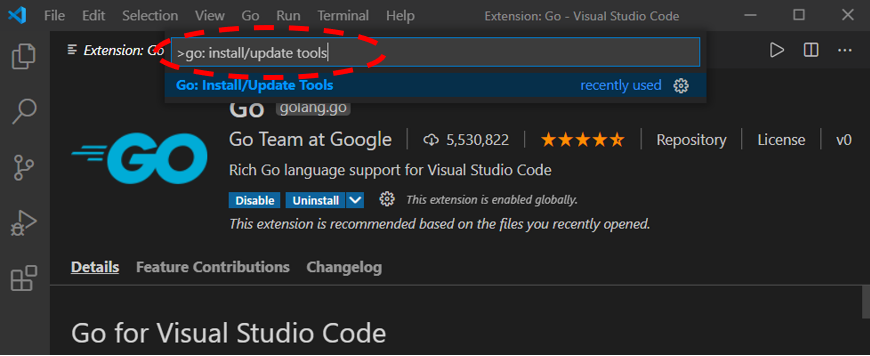
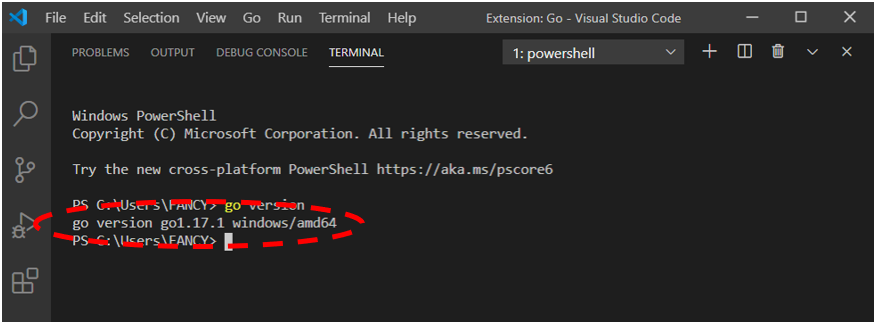
Now it is required to configure VS Code to use Go in it. While doing the configuration, make sure to enable the internet connection on your system. 
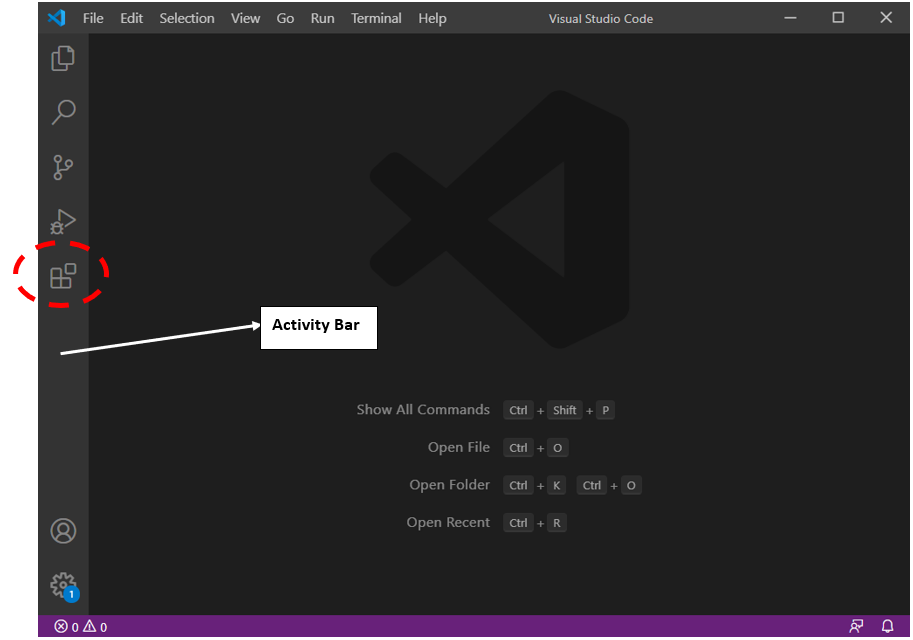
Follow the steps and corresponding pictures given below to configure the VS Code:

  1.     Launch VS Code.
  2.     Open the extension manager from the activity bar, or press Ctrl + Shift + x.
    GO : IDE
  3.     Type “go” in the search box and press Enter.
    GO : IDE
  4.     From the search result, install the Go extension by the “Go Team at Google”.
    GO : IDE
  5.     Once the installation of the Go extension is completed, open the command palette from the View menu or press Ctrl + Shift + p.
    GO : IDE
  6.     Type “Go: Install/Update Tools” in the command palette and press Enter.
    GO : IDE
  7.    Select all the tools in the list and click OK.
    GO : IDE

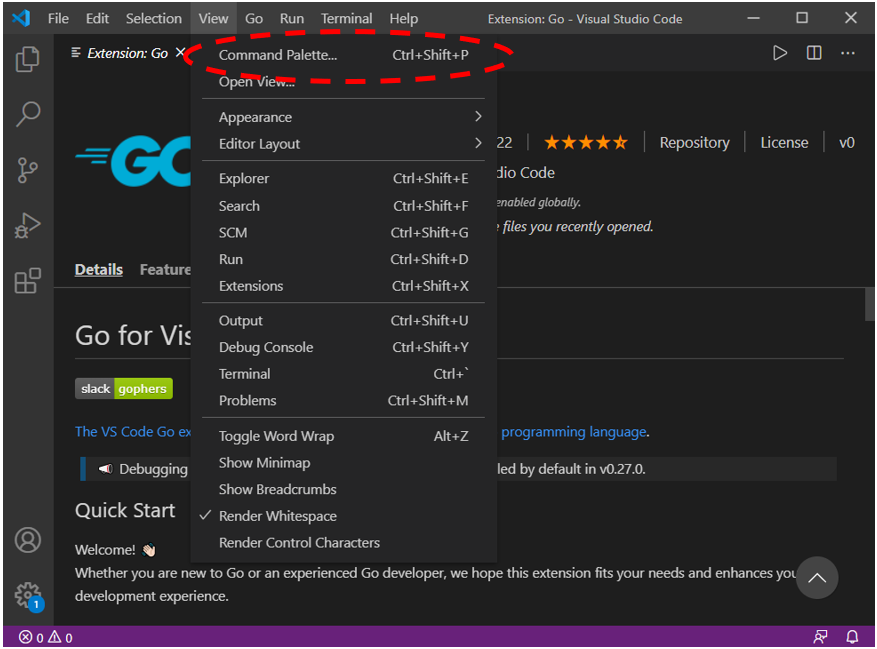
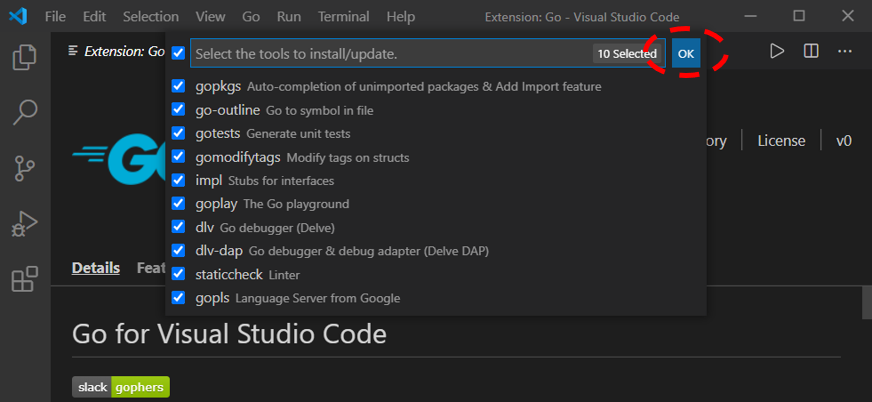
    The status of the installation will be displayed in the OUTPUT window as shown below:

    GO : IDE
  8.     Now follow the sub-steps to check if Go is installed successfully or not. 
    • Open the Terminal from the View menu or press Ctrl + `.
      GO : IDE
    • Type “go version” on the Terminal as shown in the screenshot, and press Enter:
      GO : IDE
    • If the installation is successful, then the Terminal will display the current version of Go as shown in the screenshot below:
      GO : IDE

      Now, VS Code is ready to use Go in it.

Basic Program to Print “Hello World” Using VS Code:

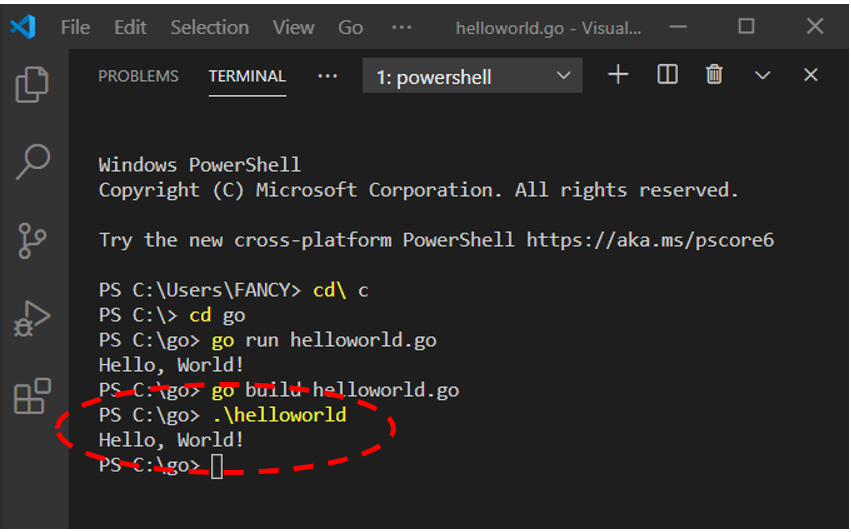
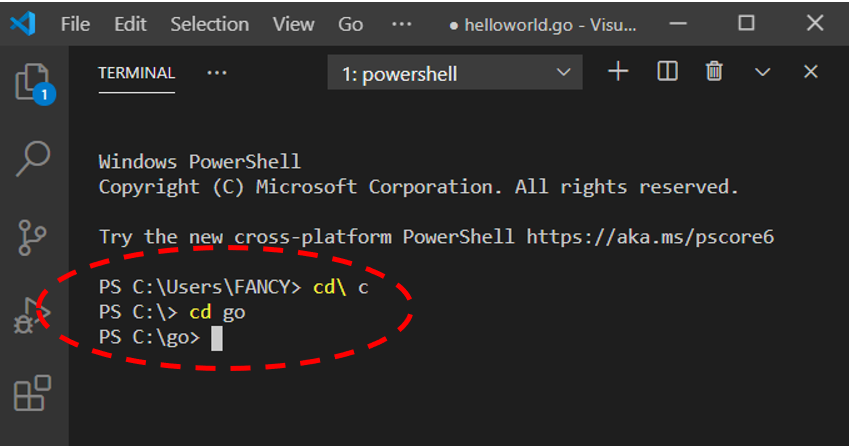
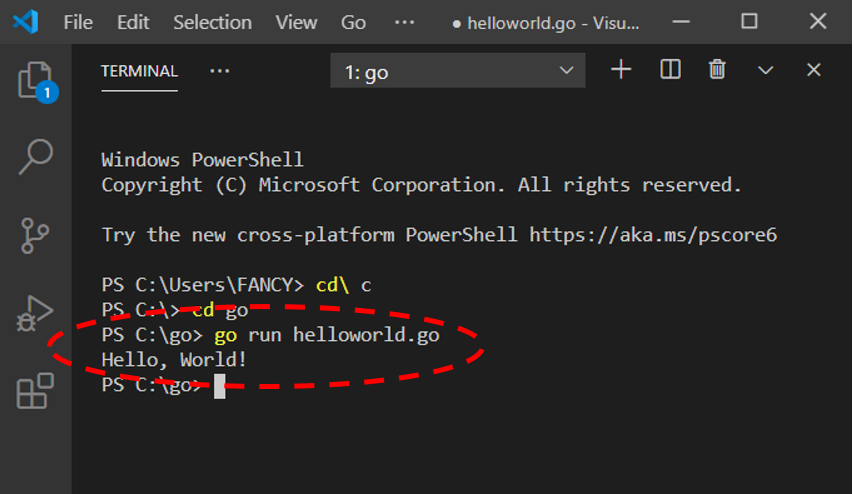
Creating and executing a go program using a text editor and command prompt is the same as creating and executing a go program in the VS Code.
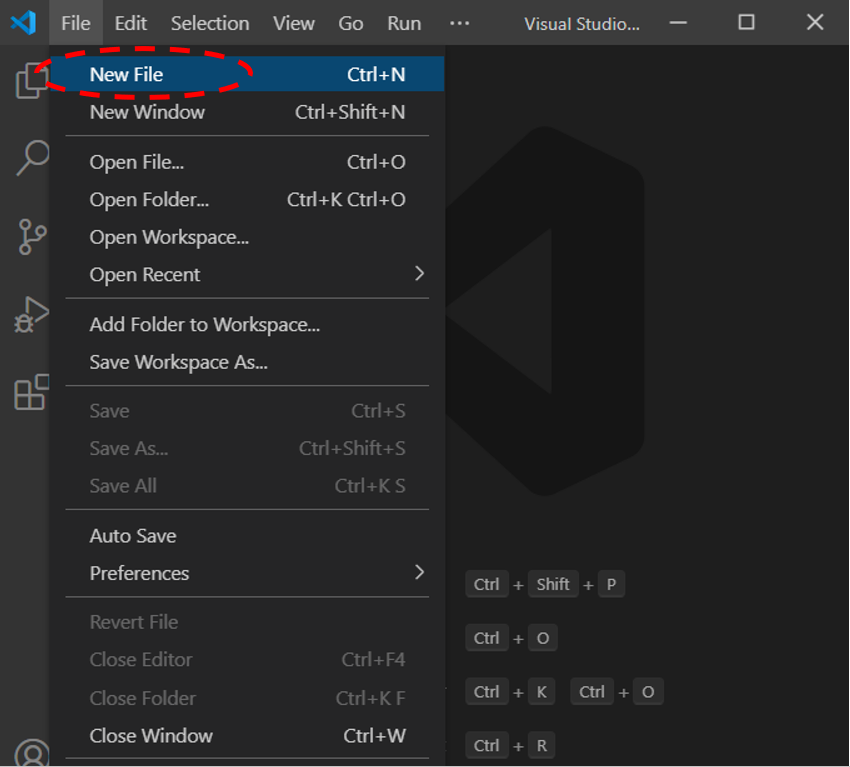
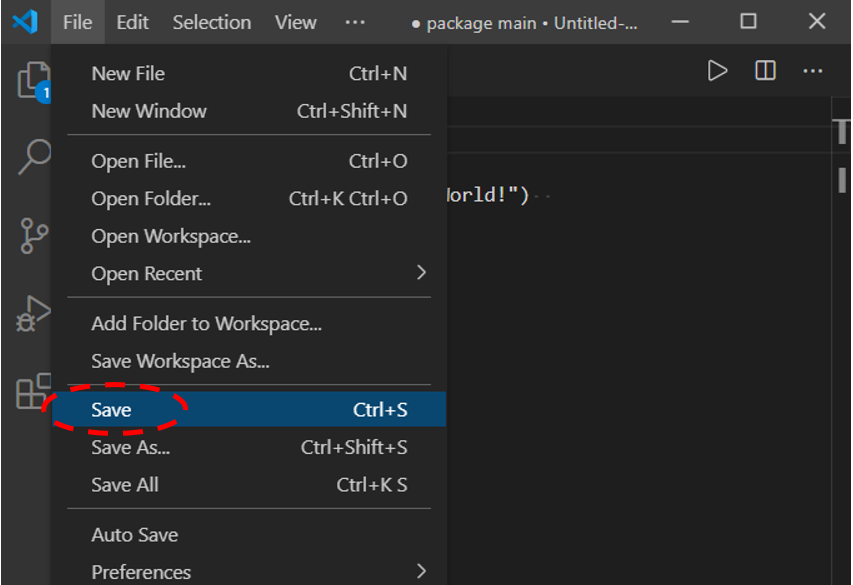
Now follow the steps to run a simple basic Go program in VS Code:
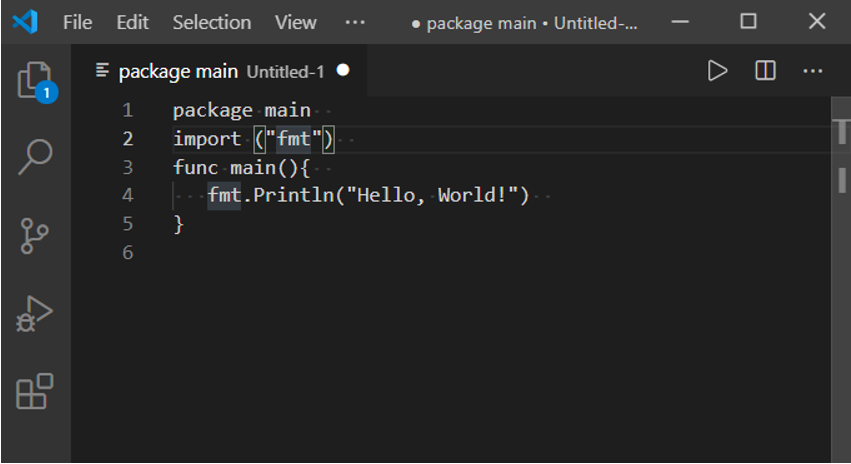
  1.     First, create a new file in VS Code by pressing Ctrl + N or selecting “New File” from the File menu. 
    File >> New File
    GO : IDE
  2.     Type or copy and paste the following Go commands into the new file just created:
    
    package main  
    import ("fmt")  
    func main(){  
       fmt.Println("Hello, World!")  
    }
    
    
    GO : IDE
  3.     Now save the file by pressing Ctrl + S or select the Save option from the File menu.
    GO : IDE
  4.     The Save As window will appear. In the window, set the location to save the Go file, and type Filename as helloworld and Save as type as GO, then click on the “Save” button:
    File >> Save As >> helloworld (Filename) >> Go (Save as type)
    GO : IDE
  5.     Follow the sub-steps to run/execute the Go program:
    • Open the Terminal in VS Code by pressing Ctrl + ` or select the Terminal option from the View menu:
      View >> Terminal
    • In the Terminal, open the folder where the Go file is saved using the “cd” (change directory) command. If your Go file is saved in a subfolder, then open each subfolder using the “cd” command as shown in the screenshot below:
      GO : IDE
    • Now type the following command in the terminal to run the program.
      go run helloworld.go
      GO : IDE
    • The program can also be saved as an executable by the following command:
      Go build helloworld.go
      GO : IDE

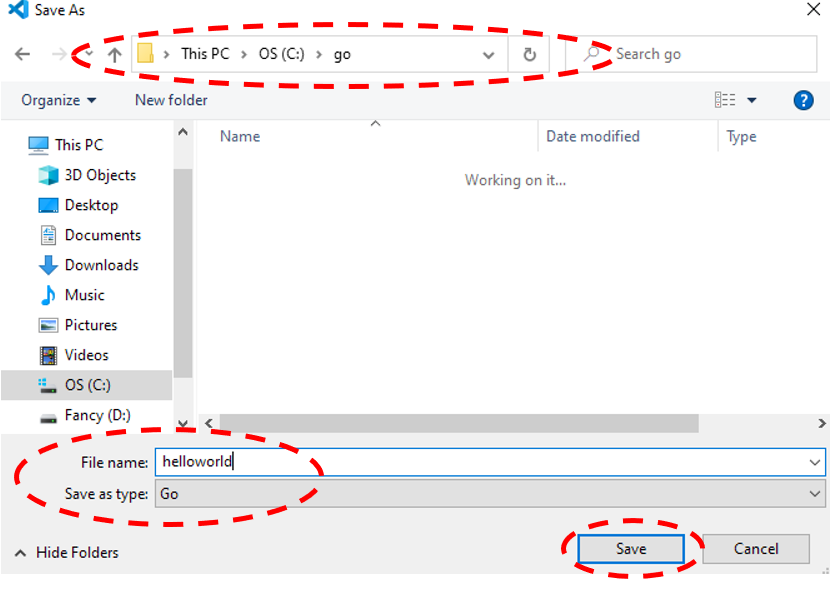
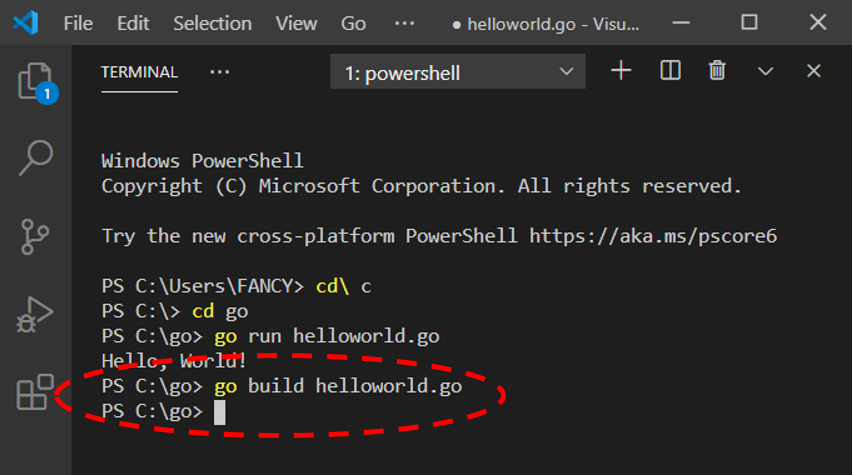
      Open the folder where helloworld (your Go file) file is saved to see the executable file.

      GO : IDE

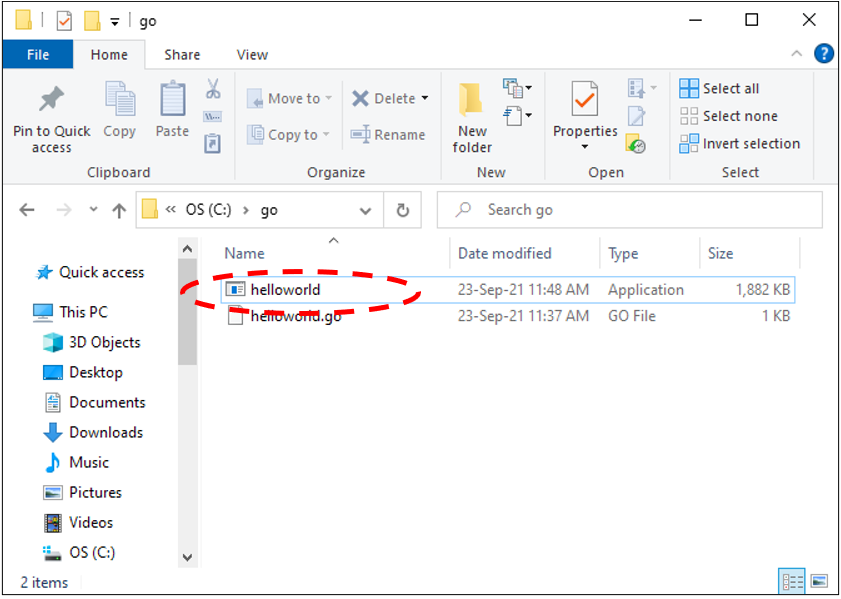
      This executable file can be accessed in the VS Code as shown in the screenshot below:

      GO : IDE