

This tutorial is structured in a way that you will start by exploring what an RStudio is and how to install RStudio into your system. After that, I will help you to get familiar with RStudio - the specialties of different tabs like the console, environment, history, package, etc.
RStudio is an Integrated Development Environment(IDE) used for running the R programming language. Like many other IDEs, RStudio also has a console, syntax highlighters and other graphical user tools for plotting and modeling, etc.
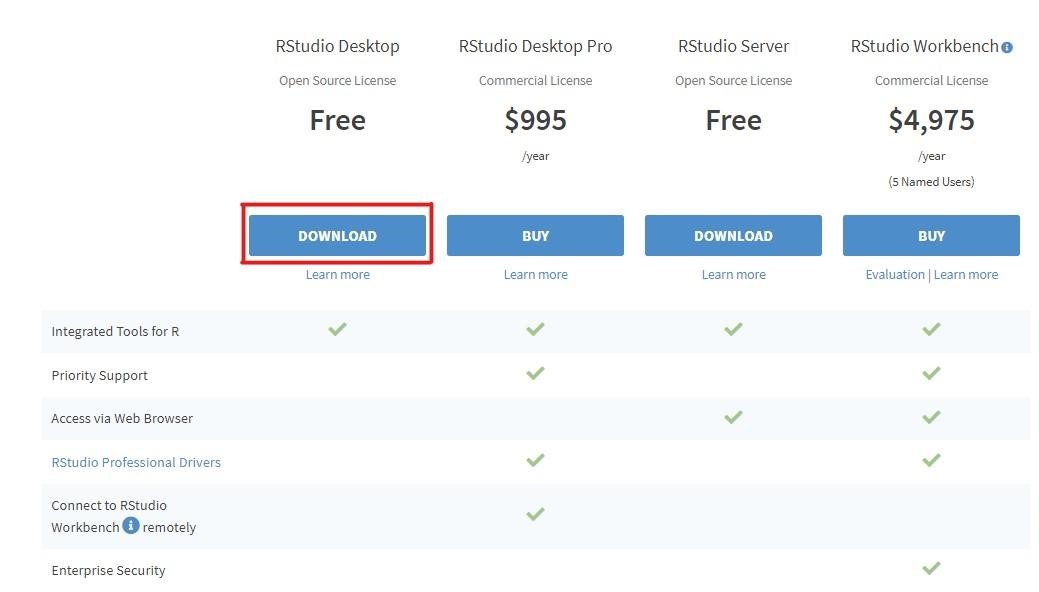
RStudio is available in two editions - open source(free) and commercial license.

Now R studio is successfully installed on your system and you can start using it to code your own R programs. Before writing an R program in Rstudio, let’s familiarize ourselves with RStudio. Following the step-by-step guide will educate you in using the IDE smoothly.
The Console tab in RStudio is the place where we write and execute the R programs. In other words, the console takes the inputs, does the operation, and displays the output at the same time.
Besides these, the console gives you some basic information about the R you are dealing with. You can have a look at the information and try to learn more about R by typing the commands in the cursor.
Let’s see how the console operates and what are the basic operations you need to accustom to while working with RStudio Console.
In R studio to clear a console use the command Ctrl + L.
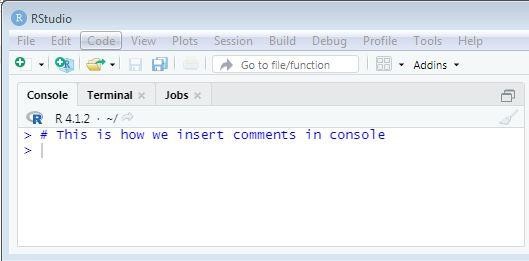
Like in Python, we can use the # symbol to comment on a line in R programming.
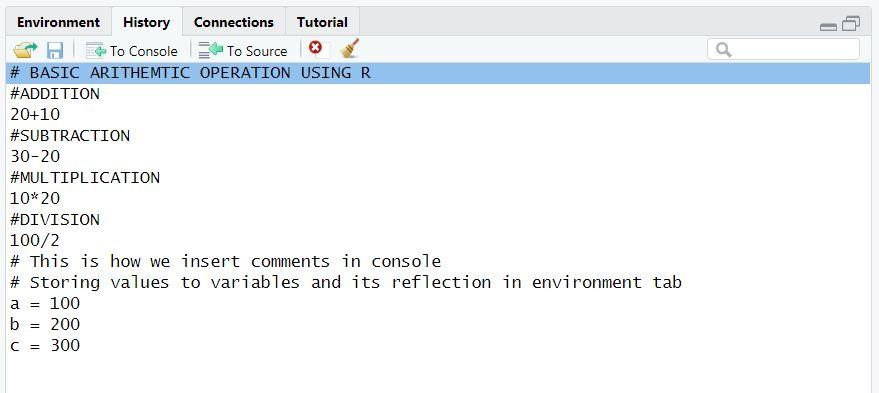
As you know, the console is the only place where immediate testing of codes takes place. See the below screenshot where the basic arithmetic operations are accomplished just by providing the operands and operators.
You will get your desired output just by hitting the enter button and as simple as that.
Note: To increase the readability, hit enter twice or thrice
The Global Environment tab plays an important role in R studio because it can be thought of as a workspace where all active objects are displayed. In R Studio, variables and data that we import are saved as objects.
When you declare a variable in the console it will automatically display in the environment tab.
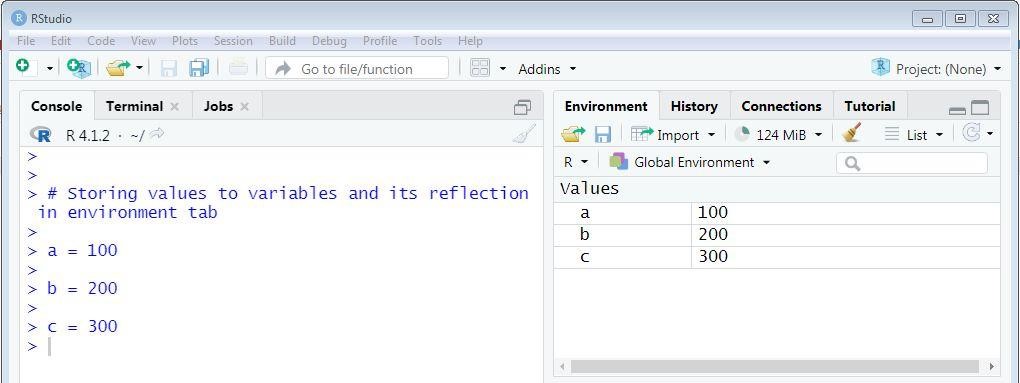
In the above example, you have 3 variables namely a, b and c, and each of them is assigned with values 100, 200, and 300 respectively. On the environment tab, you can see the values you have declared.
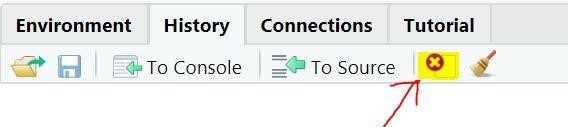
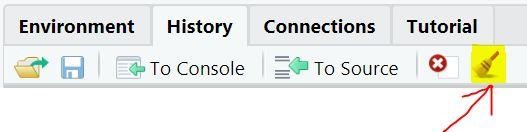
Besides these, you can find the History tab which keeps track of all the commands you used so far for your program. See the below screenshot.
You can see all the operations we have done so far in the history tab. Now suppose you want to remove some of the selected entries from the history, is it possible? Yes , it is. You can use the Red cross button in the toolbar.
Now to clear the entire history entries, you can use the broom button shown on the toolbar.
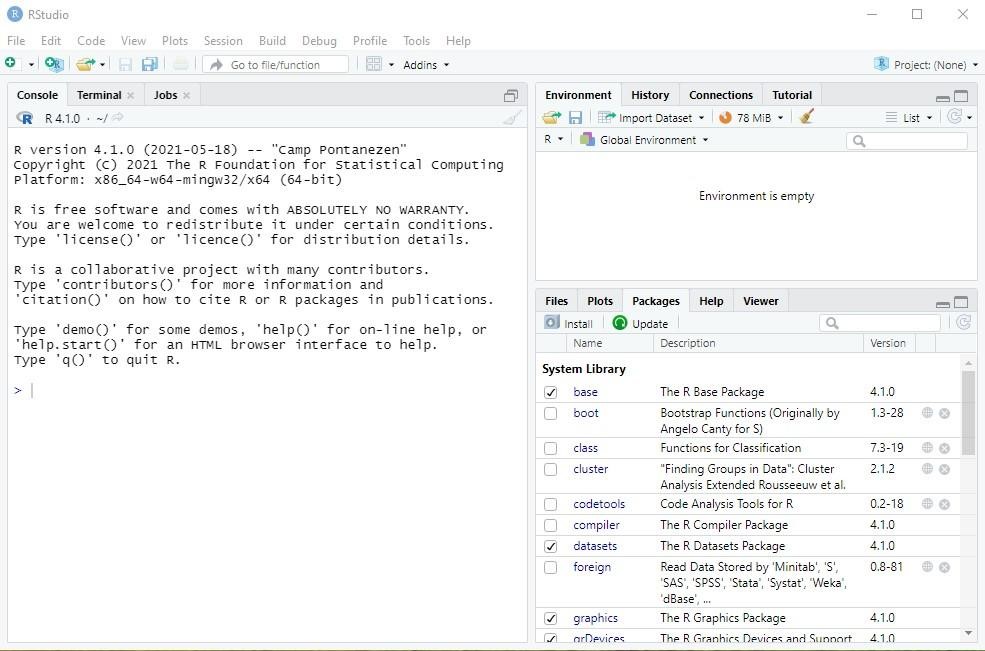
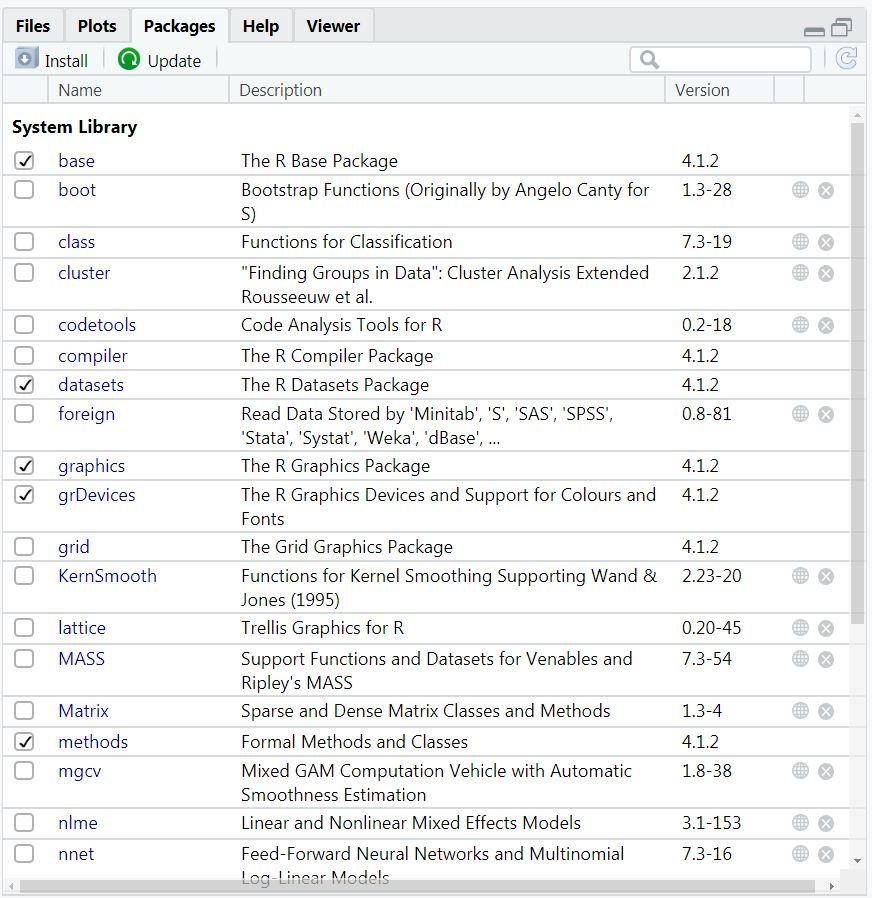
The next inevitable part in RStudio is the Package tab which lists all the packages that are necessarily needed to run the R programs. Packages are shareable collections of R compiled codes, data, functions, and documentation that are created specifically to perform specific tasks.
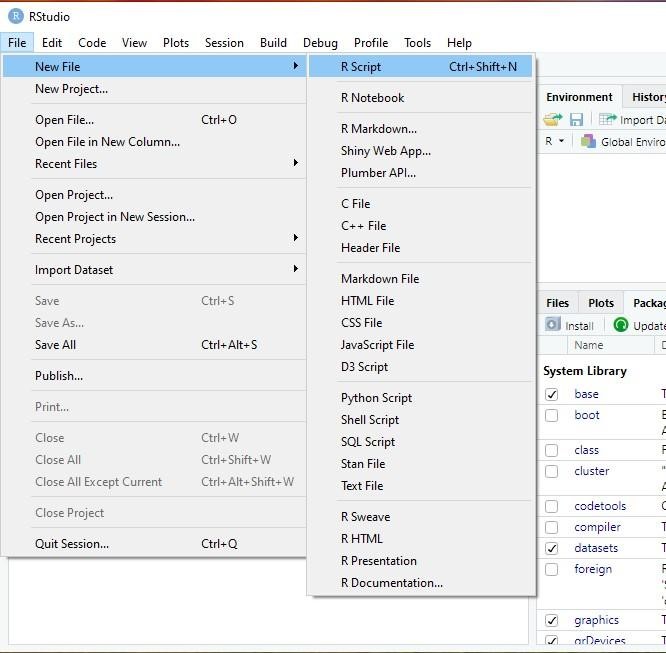
Every code you write in R has to be saved in some file for future use. For that, you need to create an R file first by following the steps below as shown in the picture, File -> New File -> R Script. Another option available is by using the shortcut Ctrl+Shift+N.
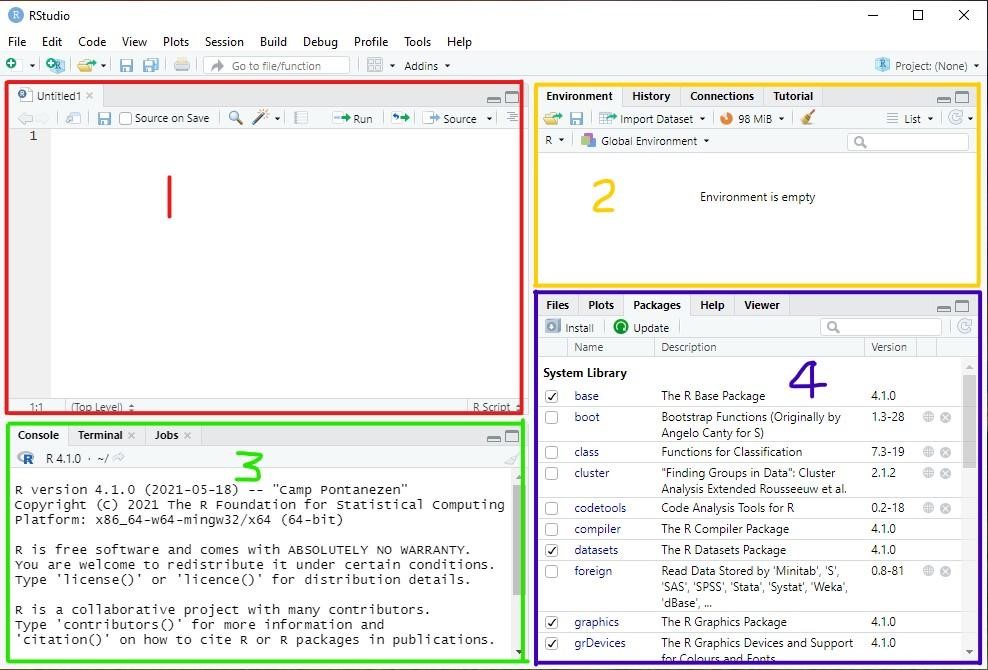
This will open you a window with four panes as shown below. The first pane is the text editor where we used to write our codes.
So now you have acquired some basic knowledge about RStudio and in the next chapter, you will get more enlightenment on how to write your first code in a Text editor and how to run your R code in RStudio, and so on. Chase our upcoming tutorials to upgrade yourself with R.